How to Build a GitHub Profile as a Computer Science Student
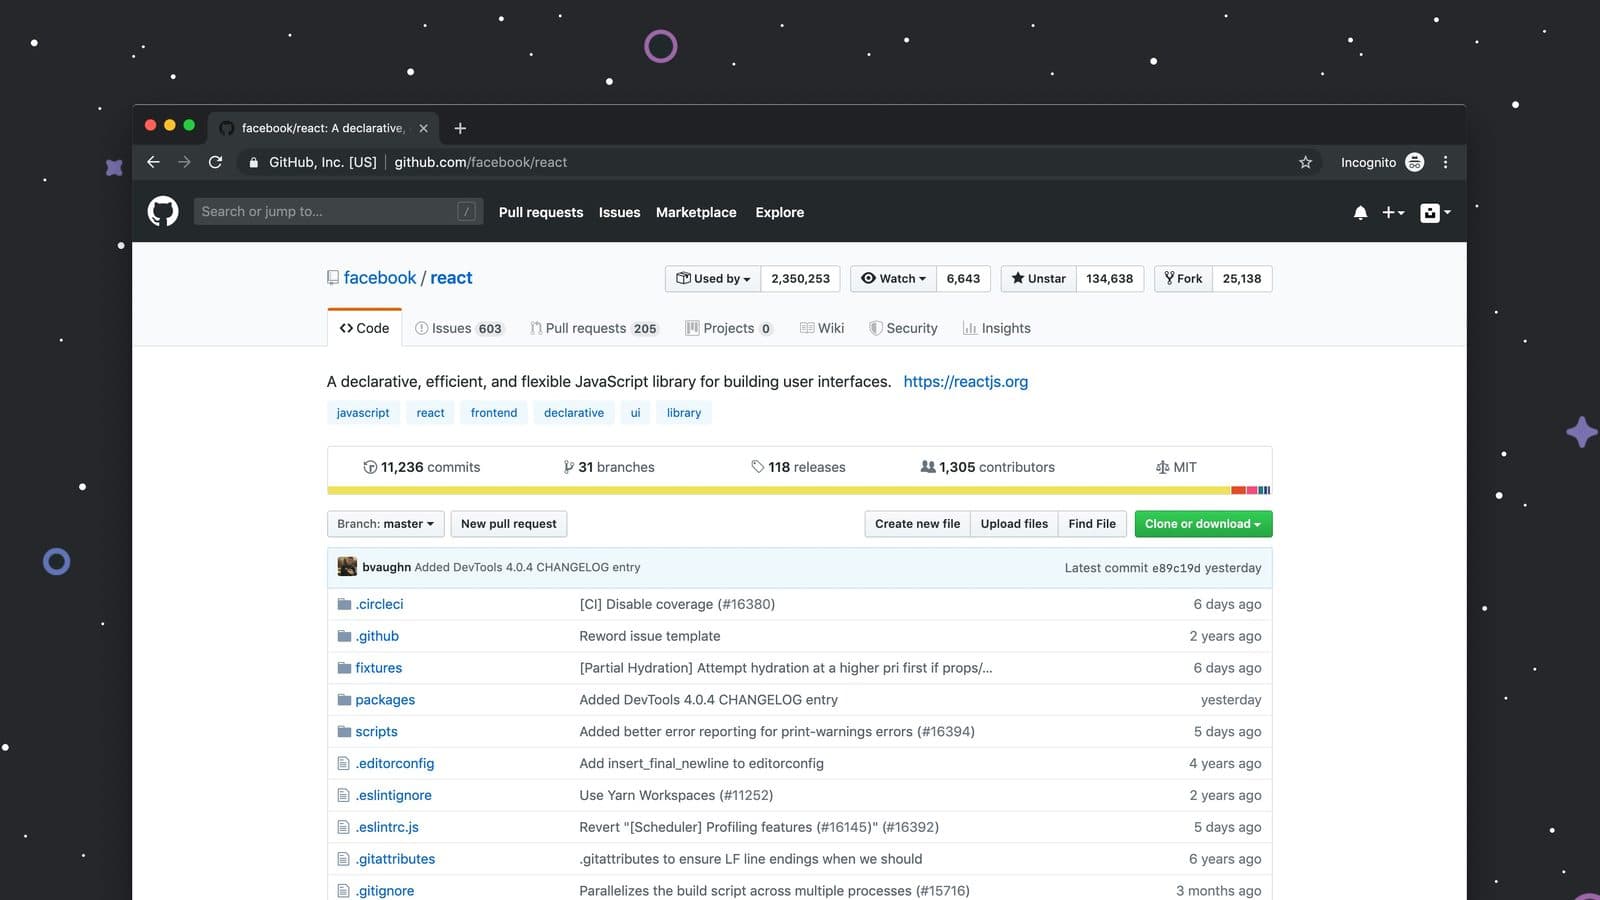
Somewhere in the middle of your second year, someone tells you that you "need a good GitHub." A senior, a placement cell presentation, a YouTube video with a thumbnail of a contribution graph glowing green. So you make an account, push your C lab programs into a repository called lab-programs, and wait for it to start working.
It doesn't. Not because GitHub doesn't matter, but because nobody told you what it's actually for.
A GitHub profile isn't a certificate or a streak counter. It's the closest thing a student has to a body of work: proof that you can build something, explain it, and keep it tidy enough that someone else could pick it up. When it's done well, it answers the question every interviewer, client or senior developer is quietly asking: if I gave this person a real task, what would come back?
I've been building software for businesses since 2018, and GitHub is where most of that work lives. When I open a developer's profile, whether it's a student asking for feedback or someone I might work with, the difference between one that makes me keep reading and one I close in ten seconds is rarely talent. It's almost always presentation, project choice and a few habits that take a weekend to fix.
This guide is everything I'd tell a CS student sitting across the table from me. It covers what people really look at, how to set up the profile itself, which projects to build and pin, how to write READMEs that do the selling for you, what to do about the green squares, how to get into open source without embarrassing yourself, and a plan you can follow from first year to final year.
The short version
If you only have five minutes, here's what a strong student GitHub profile has:
- A real photo or a clean avatar, your actual name, and a one-line bio that says what you do ("CS student at NIT Srinagar, building web apps with React and Django").
- A profile README that introduces you in a few lines and points to your best work. Short, readable, no wall of badges.
- Four to six pinned repositories that you built, that do something useful, and that someone can understand in under a minute.
- A proper README in every pinned repo, with a screenshot, a live demo link, what it does, how to run it, and why you made the choices you made.
- An honest commit history with readable messages, spread over weeks rather than dumped in one night.
- At least one contribution to someone else's project, even a small one, once you're ready.
- No leaked passwords or API keys, no
node_modulesfolders, and nothing copied from a tutorial pretending to be yours.
That's the target. The rest of this post is how to get there, and why each piece matters.
What people actually look at (and in what order)
Before you change anything, it helps to know how your profile gets read. Nobody studies it like an exam paper. Someone opens the link from your resume or your email, usually between other tasks, and forms an impression fast.
In my experience, and from what I've heard from people who hire developers, the order goes roughly like this:
- The top of the profile. Name, photo, bio, location, and the profile README if you have one. This sets the tone. A blank avatar and the username
xXcoder2004Xxsets a very particular tone. - The pinned repositories. Their names and one-line descriptions. This is where the reader decides whether to go deeper.
- One repository, opened. Usually whichever pinned project looks most interesting or most relevant to the job. They read the README first. If there's a live demo, they click it.
- The code, briefly. A quick look at the folder structure and one or two files. Is it organised? Are there obviously copied chunks? Are the variable names
a,bandtemp2? - The commit history of that repo. Were there thirty sensible commits over three weeks, or one commit called "final" with 12,000 lines?
Notice what's not near the top of that list: the contribution graph. People glance at it, but a technical reviewer learns far more from one well-presented project than from a year of green squares. We'll come back to the graph, because students worry about it more than anything else.
Also notice that step three is where most profiles fail. The reader opens a repo and finds either the default README that came with the framework, or nothing at all. At that point, your code might be excellent, and it won't matter, because nobody is going to clone and run a stranger's project to find out.
 A group of university students gathered around a laptop in a lecture hall, laughing and pointing at the screen. A GitHub profile is often the first thing a classmate, senior or interviewer opens when they want to see what you've built
Step 1: Get the account basics right
This part is boring and takes twenty minutes. Do it anyway, because it's the first thing everyone sees.
Pick a username you won't be embarrassed by in five years
Your GitHub username ends up in URLs on your resume, on project links, on your portfolio domain if you use GitHub Pages. Something close to your real name works best: owaisnoor, sana-mir, aamirdev. Avoid birth years, gaming tags and inside jokes. If you already have an embarrassing one, you can rename your account in settings. GitHub redirects old repository links for a while, but update anything important you've shared.
Fill in the profile
- Name: your real name, the one on your resume.
- Photo: a clear face photo is best. A simple, recognisable avatar is fine too. The default blank identicon suggests an abandoned account.
- Bio: one line. What you study, where, and what you like building. "Final-year B.Tech CSE, IUST. I build web apps and small tools for local businesses" tells me more than "Passionate learner | Tech enthusiast | Dreamer."
- Location: worth including. Recruiters filter by it, and "Srinagar, Kashmir" is a perfectly good answer.
- Website: your portfolio, your LinkedIn, or a GitHub Pages site if you build one later.
Fix your commit email, or your work won't show up
This one catches many students. GitHub only credits commits to your profile when the email address used in the commit is linked to your account. If you set up Git on a college lab computer with some random email, or never set it up at all, those commits appear as someone else, or as nobody.
Check what your machine is using:
git config --global user.name
git config --global user.email
Then make sure that email is added under Settings → Emails on GitHub. If you don't want your personal email visible in public commit history, GitHub gives you a private noreply address in the same settings page. Use that one in your Git config instead.
Claim the GitHub Student Developer Pack
If you're a verified student, you get a lot for free through the GitHub Student Developer Pack: GitHub Pro while you're a student, Copilot for students, free Codespaces usage, and offers from partners that have included a free domain name for a year and cloud credits. The exact list changes, so check the page, but the domain alone is worth it if you plan to build a portfolio site. Verification usually needs a college email or a photo of your student ID, and it can take a few days.
Step 2: Write a profile README that people actually read
A profile README is the box that appears at the top of your GitHub profile. You create one by making a public repository with exactly the same name as your username and adding a README.md to its root. GitHub even shows a little note when you name the repo correctly.
This is the most visible piece of real estate you have, and most students either leave it empty or turn it into a Christmas tree.
What goes in it
Keep it short enough to read in thirty seconds. A good structure:
- One or two sentences about who you are and what you're working on.
- What you're good at, in plain words or a short list of your main tools. Not every technology you've heard of. The ones you'd be comfortable being asked about in an interview.
- Two to four links to your best projects, each with a one-line description. Yes, they're also pinned. Pinned repos show a name; here you can say why they matter.
- What you're looking for, if anything. "Open to summer 2027 internships in backend development" is useful to a recruiter who landed on your page.
- How to reach you. Email or LinkedIn.
Here's a version that would make me keep reading:
# Hi, I'm Sana 👋

Third-year CSE student at the University of Kashmir. I like building
backend-heavy web apps, and lately I've been learning how to make
them fast and reliable, not just working.

**Mostly working with:** Python, Django, PostgreSQL, React, Docker

### Things I've built
- **[Kanal](https://github.com/sana-mir/kanal)**: attendance and notes
  portal used by around 60 students in my department. Django + Postgres.
- **[bus-times-srinagar](https://github.com/sana-mir/bus-times-srinagar)**:
  a small PWA listing city bus routes and timings, works offline.
- **[rate-limiter](https://github.com/sana-mir/rate-limiter)**: token
  bucket rate limiter in Python, with tests and a benchmark write-up.

### Right now
Contributing docs and small fixes to an open-source Django package,
and looking for a backend internship for summer 2027.

📫 sana.mir@example.com · [LinkedIn](https://linkedin.com/in/example)
It's specific, it's honest about scale ("around 60 students", not "thousands of users"), and it leads straight to the work.
What to leave out
There's a whole genre of profile READMEs built from generators: a typing animation, a snake eating your contribution graph, three stats cards, a trophy row, a "profile views" counter and forty technology badges. They look fun the first time. After the hundredth, they read as "I spent an evening on decoration."
A few specific things I'd skip:
- Stats cards showing "Top Languages." They often misrepresent you. One repo with a big generated CSS file and suddenly you're "62% CSS."
- Badge walls. If you list twenty-five logos, the reader assumes you've used most of them once.
- Profile view counters. They draw attention to a number that's usually small.
- Quotes about passion or hustle. Your projects should do that job.
One small image or a single stat card is fine if you genuinely like it. Just keep the focus on what you've built.
Step 3: Build and pin the right projects
GitHub lets you pin up to six repositories to the top of your profile. These six slots matter more than everything else on the page combined.
The mistake most students make is pinning what they have rather than what represents them. Your pinned list ends up being a to-do app from a tutorial, a calculator, the college mini-project that three people worked on, and a fork of someone else's repo. Every one of those tells a reviewer the same thing: this person has followed instructions.
What makes a project worth pinning
A strong student project usually has at least two of these:
- Someone besides you used it. Classmates, a relative's shop, a local NGO, your hostel. Even ten real users changes the conversation in an interview, because now you can talk about bugs they found and things you changed.
- It solves a problem you actually had. Reviewers can tell the difference between "I needed this" and "a list of project ideas said so."
- It goes one level deeper than the tutorial. Authentication done properly, a real database with sensible relations, file uploads, a payment sandbox, caching, background jobs, tests.
- It's deployed. A live link beats a "how to run" section every single time.
- You can explain the decisions. Why Postgres over MongoDB here? Why did you split this into two services, or why didn't you?
Upgrading common student projects
You don't need a brilliant original idea. You need to take an ordinary idea further than most people bother to. Here's what that looks like in practice:
| Common project | The version that stands out |
|---|---|
| To-do app | A task board for your college club, with login, shared boards, due-date reminders by email, and a deployed demo with a test account |
| Weather app | A small tool for Kashmir that combines forecast data with road status for routes like Srinagar–Jammu, caches API responses and works on slow mobile networks |
| E-commerce clone | A real catalogue and order system for a relative's or neighbour's shop, with an admin panel they actually use and stock that updates on each order |
| Chat app | A chat app with message delivery states, reconnect handling and a write-up of what happens when a user goes offline mid-message |
| Portfolio website | A portfolio that loads fast on a mid-range phone, scores well on Lighthouse, and has a short write-up of how you got it there |
| Library management system (the classic mini-project) | The same system, but with role-based access, search that handles typos, overdue fine calculation, and a seeded demo others can log into |
That "write-up" column matters. If you've built a chat app and read how the big ones handle delivery and ordering, like in my breakdown of how WhatsApp handles millions of messages, you can write a paragraph in your README about which of those ideas you borrowed and which you deliberately left out. That paragraph is worth more than another feature.
How many projects, and what mix
For most CS students, a good pinned set looks something like:
- Two substantial projects in the area you want to work in. Built over weeks, deployed, documented.
- One or two smaller, sharp projects that show depth in something specific: a CLI tool, an algorithm implementation with benchmarks, a library, a browser extension.
- One open-source contribution or collaborative project, once you have one. You can pin repositories you've contributed to, not just your own.
- Optionally, your portfolio or profile site, if it's well made.
Six is the maximum, not a target. Four strong pins beat six where two are weak.
About DSA and competitive programming repos
A repository of your LeetCode solutions is fine to have. It shows consistency, and some interviewers like seeing it. But it shouldn't be pinned above your projects, because thousands of other students have the same repo with the same problems. If you want DSA work to stand out, build something around it instead. Implement a few algorithms, measure them, and write up what you found. My algorithm visualiser lets you step through sorting and searching algorithms and compare two side by side, which is a good way to actually understand the behaviour before you try to explain it in writing.
 A whiteboard covered in orange and blue sticky notes arranged in columns. Planning a project in small, visible pieces makes it far easier to build it steadily and commit as you go
Step 4: Make every repository readable in under a minute
This is where most of your effort should go, and where most students put in none. A reviewer who opens your repo is giving you maybe sixty seconds. The README has to do the work.
The README template I'd use
Adapt this for each pinned project:
# Kanal
Attendance and notes portal for the CSE department at the University
of Kashmir. Teachers mark attendance from their phones, students see
their percentage and download shared notes.
**Live demo:** https://kanal.example.app
(login: demo@kanal.app / demo1234, read-only)

## Why I built it
Attendance was tracked in paper registers and shared as blurry photos
on WhatsApp. Students found out they were short on attendance at the
end of the semester. This fixes that for our department.
## Features
- Teachers mark attendance per lecture in under 30 seconds on mobile
- Students see attendance percentage per subject, with a warning below 75%
- Notes upload with file size limits and virus scanning
- Role-based access: admin, teacher, student
## Tech
Django 5, PostgreSQL, HTMX, Tailwind, deployed on Railway.
## Decisions and trade-offs
- Chose HTMX over React because most users are on slow mobile data and
the pages are mostly forms.
- Attendance records are never edited in place; corrections create a new
record so there's an audit trail.
## Running locally
1. Clone the repo and create a virtualenv
2. `pip install -r requirements.txt`
3. Copy `.env.example` to `.env` and fill in the values
4. `python manage.py migrate && python manage.py runserver`
## What I'd do next
Push notifications for low attendance, and a proper test suite for the
permissions logic, which currently has only partial coverage.
A few things are doing a lot of work here:
- The first two lines say what it is and who it's for. No "This project is a web application which..."
- The demo link has a test login. Nobody will sign up to see your project. Give them a way in.
- A screenshot. Instantly tells the reader whether this is a real, finished thing. Compress it first, since a 6 MB PNG in a README loads slowly and bloats your repo. My free image compressor runs in your browser and gets screenshots down to a fraction of the size.
- "Why I built it." This is the part that turns a project into a story you can tell in an interview.
- "Decisions and trade-offs." This is the section that separates students who followed a tutorial from students who thought about what they were doing. Even two bullet points are enough.
- "What I'd do next," including what's weak. Admitting that test coverage is thin reads as maturity, not weakness. Every real project has a list like this.
Small things that make a repo look cared for
- A one-line description and a few topics on the repo's main page (the gear icon next to "About"). This is what shows up on your pinned card.
- The live URL in the "Website" field, so it appears at the top of the repo.
- A sensible folder structure. If you're not sure what that looks like for a modern web app, my post on Next.js architecture walks through how I organise real projects.
- A
.gitignoreso you're not committingnode_modules,venv, build folders or.DS_Storefiles. - A license if you want others to use the code. MIT is the common default for personal projects.
- No commented-out blocks of dead code and no files called
test2_final_REAL.js.
Never commit secrets
I have to make this its own section because it's the one mistake with real consequences. If you push an API key, database password or cloud credential to a public repo, assume it's been seen. Automated scanners watch public GitHub pushes constantly, and leaked cloud keys have been used to run up large bills within hours.
GitHub now blocks many well-known key formats from being pushed to public repos, but not all of them, and it can't catch a password you typed into a config file.
The fix is simple:
- Keep secrets in a
.envfile, and add.envto.gitignorebefore your first commit. - Commit a
.env.examplewith the variable names and fake values, so others know what to set. - If you've already pushed a key, revoke it immediately at the provider. Deleting the file in a new commit doesn't help, because it's still in the history.
A leaked Firebase config or a hardcoded admin password in a pinned repo is an instant red flag for any reviewer who spots it, because it's exactly the kind of mistake that ends up on the news when it happens in a company.
Step 5: Let your commit history tell the story
Most students don't realise people read commit history. They do, especially for the one repo they open. It shows how you work.
What a good history looks like
A healthy project history has many small commits over a period of time, each doing one thing, with a message that says what changed. Something like:
Add attendance percentage calculation per subject
Show low-attendance warning on student dashboard
Fix timezone bug in lecture date display
Add .env.example and remove hardcoded DB URL
Write tests for teacher permission checks
Compare that with the history I see all the time:
initial commit
update
changes
final
final 2
fixed
The first tells a reviewer you work in steps and can describe what you did. The second suggests you wrote the whole thing locally and uploaded it at the end, or copied it from somewhere. That might not be true, but you don't get to explain.
Habits that fix this naturally
- Commit when a small piece works, not at the end of the day. "Login form validates email" is a commit. "Built the whole auth system" is five commits.
- Write the message as if finishing the sentence "This commit will..." Short, present tense, specific: Add search by roll number, Fix crash when notes list is empty.
- Use branches and pull requests on your own projects. It feels like overkill when you're alone, but it's how every team works. Open a PR from
feature/notes-uploadintomain, describe what it does, and merge it yourself. Your repo now shows that you know the workflow, and you've practised it before your first internship. - Use issues as your to-do list. Create issues for features and bugs, reference them in commits, and close them from PRs. A repo with twenty closed issues looks like a real project, because it was run like one.
If you're heading into an internship soon, this is exactly the workflow you'll be doing every day. I wrote more about that in what a software engineering internship actually looks like, including how code review works once someone else is reading your pull requests.
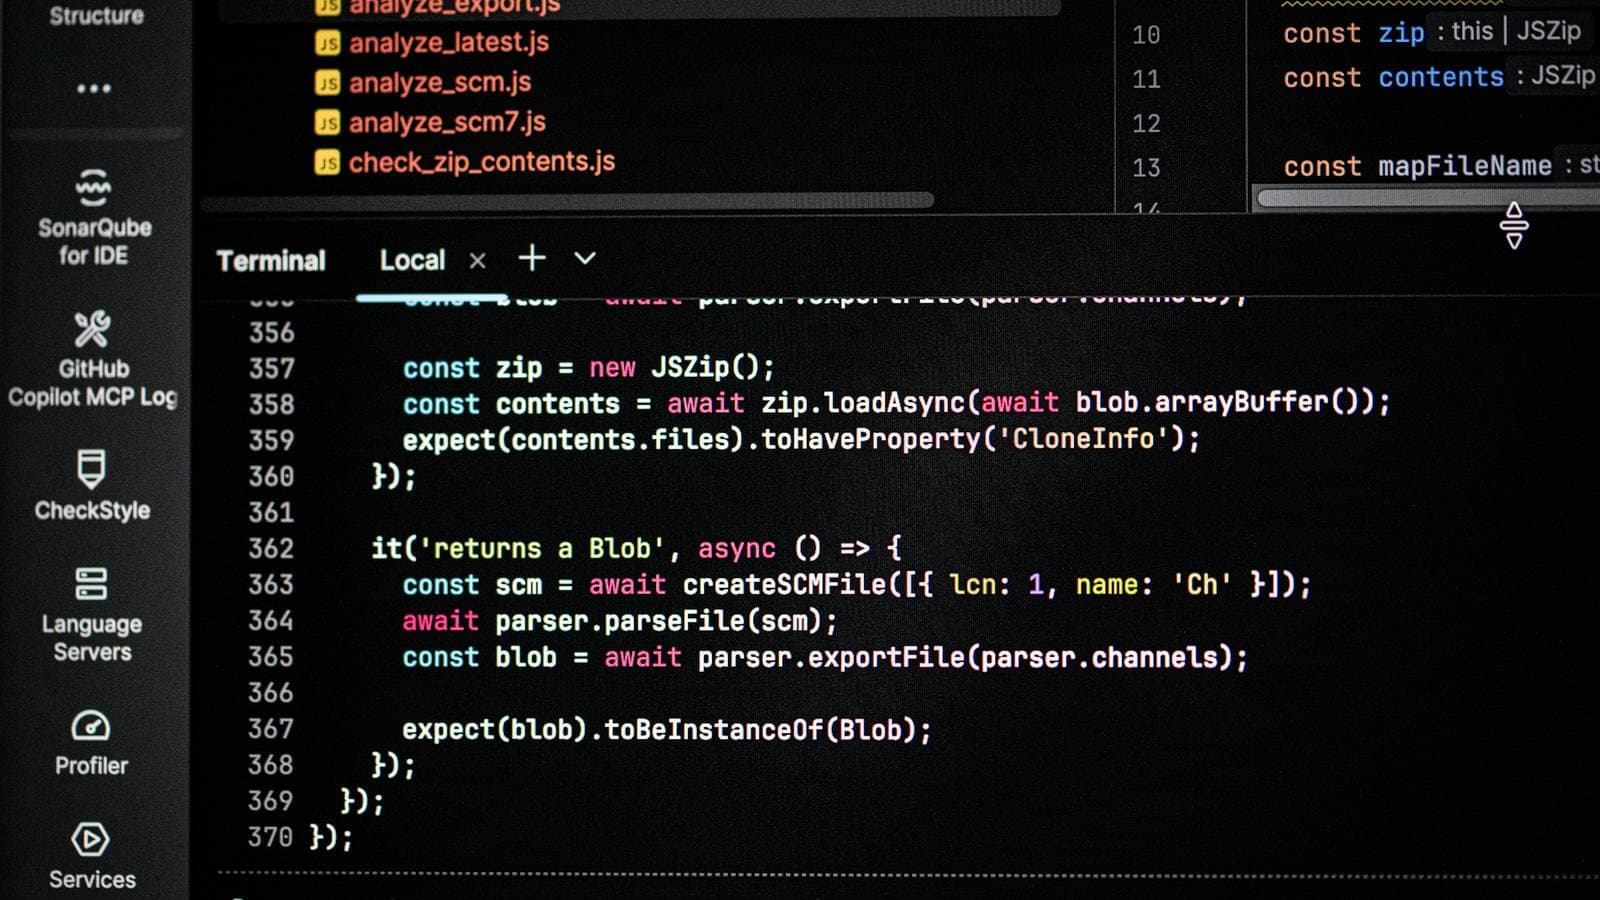 A code editor with a file tree and a terminal panel open, showing test code and command output. Small, well-described commits make a project's history easy to follow for anyone who opens it
The green squares: how much do they matter?
Less than YouTube suggests, more than zero.
The contribution graph shows activity: commits to your repos, pull requests, issues, reviews. A mostly empty graph with a burst every exam break is completely normal for a student, and nobody sensible will reject you for it. A steady, lightly green graph over a year does quietly say "this person codes regularly," which is a nice signal alongside good projects. It is not a substitute for them.
A few things worth knowing about how it works, straight from GitHub's own rules:
- Commits only count if the commit email is linked to your account (see Step 1), they're on the repo's default branch or
gh-pagesbranch, and they're in a standalone repo, not a fork. - Work in forks doesn't show up as commits on your graph, though the pull request you open to the original project does count once it's opened there.
- Private repository activity is hidden by default. If most of your work is in private repos (college projects, freelance work), you can turn on "Private contributions" in your profile settings. Visitors then see the activity count without any private details.
- The graph uses UTC, so late-night commits in India can land on the "next" day. Not something to worry about, just a thing that confuses people.
Please don't fake it
There are scripts that fill your graph with automated commits, and repos where people commit a date to a text file every day to keep a streak alive. Experienced reviewers spot this immediately: hundreds of commits to a repo called streak or daily-log, each changing one line. It doesn't just fail to help. It makes the reader wonder what else on the profile is decoration.
Consistency is good when it's real. Aim for a rhythm you can keep: a few focused sessions a week on a project you care about will fill the graph honestly, and give you something to talk about.
Step 6: Get into open source, carefully
Contributing to someone else's project is one of the strongest things a student can show, because it proves you can read unfamiliar code, follow a project's rules and handle review from strangers. It's also where students most often make a bad first impression, so it's worth doing properly.
Finding a first contribution
The best first contribution is to something you already use. The library in your project that had a confusing error message. The docs page that was out of date when you followed it. The CLI tool whose install instructions didn't work on Windows. You already have context, and you already know the problem is real.
If nothing comes to mind, GitHub's search can help: look for issues labelled good first issue or help wanted in projects written in a language you know. Filter by recent activity, because an issue from 2021 with no maintainer replies is a dead end.
How to not be that contributor
Maintainers of popular projects deal with a flood of low-effort pull requests, especially from students chasing a line on their resume. In 2020, Hacktoberfest (DigitalOcean's October open-source event) became infamous when maintainers were buried in spam PRs that did things like add a single word to a README. The event changed its rules so that projects must opt in. That episode still shapes how many maintainers view first-time contributors, so start on the right foot:
- Read
CONTRIBUTING.mdand the code of conduct before anything else. Many projects spell out exactly how they want PRs structured. - Comment on the issue first. Say you'd like to work on it and briefly describe your approach. Wait for a reply, especially on bigger changes.
- Keep your first PR small and focused. One fix, one clear description, tests if the project has them.
- Be patient. Maintainers are often volunteers. A week without a reply is normal. A polite follow-up after that is fine.
- Take review well. If they ask for changes, make them and say thanks. That exchange is often more impressive to a future employer than the code itself.
- Never open PRs just to fix typos in fifty projects. A genuine docs fix that saves the next person an hour is valuable. Changing "color" to "colour" is not.
Programmes worth knowing about
- Hacktoberfest has run every October since 2014 and encourages contributions to participating projects. It's a friendly on-ramp if you stick to projects that have opted in and make real contributions.
- Google Summer of Code pays contributors to work with open-source organisations over the summer. Since 2022 it's been open to anyone 18 or older who is new to open source, not only university students, and the application depends heavily on engaging with the organisation well before the deadline.
- College and local tech communities. GDG chapters, college coding clubs and hackathon teams often have shared repos where your first collaborative work can happen with people you know.
 A developer working on a laptop late at night in a dark room, lit only by the screen. Steady, focused sessions on a project you care about do more for your profile than any streak
Step 7: Put a portfolio on GitHub Pages (optional, but easy)
GitHub will host a static website for free. Create a repository called yourusername.github.io, push an index.html (or a built static site), and it's live at that address. With the domain from the Student Pack, you can point your own name at it.
A simple portfolio site is useful because it's friendlier than a GitHub page for non-technical readers: a recruiter, a client, a professor writing a recommendation. Keep it simple:
- Your name, a line about what you do, and a photo.
- Three or four projects with screenshots, a paragraph each, and links to both the live demo and the repo.
- A short "about" and a way to contact you.
Make it fast. A portfolio that takes eight seconds to load on a phone says something about you as a developer. Add a proper favicon while you're at it, since it's the small detail everyone notices when it's missing. The favicon generator on my site makes all the sizes from one image.
A year-by-year plan for CS students
The best profiles aren't built in a panic the week before placements. Here's a rough plan across a four-year degree. If you're further along, start from where you are and move faster.
First year: learn the tools, build small things
- Create the account, set up the profile and commit email properly.
- Learn Git on the command line:
init,add,commit,push,pull, branches. Don't just use the upload button on the website. - Push small projects as you learn: a CLI game, a personal website, a script that automates something annoying. These probably won't be pinned later, and that's fine.
- Get the Student Developer Pack.
Second year: build your first real project
- Pick one idea with a real user, even if that user is your department or your family's business, and build it over a couple of months.
- Deploy it. Write the full README. Use issues and branches.
- Write your profile README.
- Start reading other people's code in the libraries you use.
Third year: go deeper, contribute outward
- Build a second substantial project in the direction you want to work: backend, mobile, data, frontend, systems.
- Make your first open-source contributions. Aim for one merged PR you can talk about in detail.
- Clean up your pinned list. Unpin the early stuff.
- Apply for internships with your GitHub link front and centre.
Final year: polish and point
- Tidy every pinned repo: screenshots, demo links, fresh READMEs, fixed broken deploys.
- Add the internship project to your profile if you're allowed to (many company projects are private; write about them in your README instead).
- Tailor what's pinned to the kind of role you're applying for. You can change your pins whenever you like.
If you're earlier than all of this, or coming from outside computer science entirely, you don't need to wait for a syllabus. I wrote a free 90-day plan called THE PATH for students in Kashmir who want to go from zero to a first paying client, and there's a full walkthrough of the roadmap on the blog. A project built for a paying client, even a small one, is the strongest thing you can pin.
 A coding screen seen at an angle with lines of code glowing in blue and orange light. A pinned project with a clear README and a live demo does more work than any number of repositories nobody opens
Mistakes I see on student profiles all the time
Most of these take ten minutes to fix. They're worth fixing because each one costs you a little credibility, and they add up.
- Pinned forks of famous repos. Forking React doesn't mean you worked on React. Unless you have merged changes there, unpin it.
- Thirty repositories called
assignment-1toassignment-30. Archive them, make them private, or combine them into one repo calledcourseworkwith a tidy README. - The framework's default README left in place. "This project was bootstrapped with Create React App" is the first line of more student repos than I can count. It tells the reader you never came back to it.
- Tutorial projects presented as original work. If you built it by following a course, say so in the README, and then explain what you added on top. Pretending otherwise is easy to spot and hard to recover from in an interview.
- Everything in one giant repo. Separate projects deserve separate repos with their own READMEs.
- Broken live links. Free hosting tiers expire and databases go to sleep. Click every demo link before you apply anywhere.
- Group projects with no mention of the group. If four people built it, say so, and say which parts you did. Interviewers will ask.
- Uploaded zip files. A repo containing
project.zipisn't a repo. - Secrets and personal data. Covered above, but it's worth repeating: real student data, phone numbers and API keys don't belong in public repos.
A 30-minute profile audit you can do today
Open your profile in a private browser window so you see it the way a stranger does, then go through this list:
- Does the top of the page tell me your name, what you do and where you are?
- Is there a profile README, and can I read it in under thirty seconds?
- Are your pinned repos your four to six best, and are any of them forks or tutorial clones?
- Does every pinned repo have a description, a screenshot and a working demo link?
- Open each pinned README. Does the first paragraph say what the project is and who it's for?
- Is there anything in a public repo you wouldn't want an employer to see: keys, passwords, rude commit messages, personal data?
- Are your commits showing up on your graph? If not, check your commit email.
- Could someone clone your best project and run it using only the README?
Fix whatever fails. Then send the link to one person who'll be honest with you, a senior or a working developer, and ask them what they noticed first. That answer is usually more useful than any checklist.
 Three people at a bright office table with a laptop and printed papers, in the middle of a conversation. In an interview, a good GitHub profile turns into a set of stories you can tell about real work
How your GitHub gets used in an interview
Here's the part students don't expect: a good profile doesn't just get you shortlisted. It shapes the interview itself.
When an interviewer has seen your project, the conversation often starts there. "Tell me about the attendance app. Why did you store corrections as new records instead of editing them?" That's a question you can answer well, because you made that decision. It's a far better place to be than a cold whiteboard problem.
So prepare for it. For each pinned project, be ready to explain in two minutes:
- What it does and who uses it.
- The hardest bug you hit and how you found it.
- One decision you'd make differently now, and why.
- How it would need to change if it had a hundred times more users.
That last question comes up a lot. You don't need a perfect answer, just a sensible one that shows you've thought beyond "it works on my laptop."
If you're on the other side of the table: reading a developer's GitHub before you hire
Some of the people who read this won't be students. You might run a business in Srinagar, Dubai or anywhere else, and you're about to hire a freelancer or a small team to build a website, an app or internal software. A GitHub link might be one of the things they send you.
Everything above works in reverse. A few things to look for, even if you're not technical:
- Do the READMEs explain things clearly? Someone who can explain their own project to a stranger will probably be able to explain your project's problems to you.
- Are projects finished and deployed, or is it a graveyard of half-started repos?
- Do they talk about real users and trade-offs, or only list technologies?
- Is there evidence of maintenance over time? Software for a business isn't built once. It needs updates, fixes and someone who comes back.
Keep in mind that most professional client work sits in private repositories, because the code belongs to the client. An experienced developer's public GitHub often shows less than their actual work. That's why a portfolio of shipped projects, case studies and client references matters more at that level. If you're weighing whether to go with a solo developer or an agency, I wrote an honest comparison of freelancers versus web development companies in Kashmir.
For what it's worth, this is the work I do every day. I build web applications, mobile apps and custom software for businesses, and I write them the way this guide describes: documented, organised and easy for the next developer to pick up. You can see examples like the GOC inventory management platform and the J&K BOSE school management system, and more detailed write-ups in my case studies. If you have a project in mind, ask for a quote and I'll tell you plainly what it involves.
Frequently asked questions
Is GitHub important for computer science students? It's one of the most useful things a CS student can have, because it shows actual work rather than grades or certificates. It matters most for internships and jobs at startups, product companies and agencies, where reviewers often look at your projects before or during interviews. It won't replace DSA preparation for big tech, but it helps you stand out once you're in the room.
How many projects should I have on my GitHub profile? Quality matters more than count. Four to six pinned projects, with two substantial ones that are deployed and well documented, is a strong profile for a student. You can have many more repositories, but only the pinned ones get real attention.
What should I put in my GitHub profile README? A couple of lines about who you are and what you build, the main tools you're comfortable with, links to your best two to four projects with a one-line description each, what you're currently looking for, and how to contact you. Keep it short and skip the badge walls and animated widgets.
How do I create a GitHub profile README?
Create a new public repository with exactly the same name as your GitHub username, and add a README.md file to its root. Whatever you write in that file appears at the top of your profile.
Why aren't my commits showing on my contribution graph?
Usually because the email in your Git config isn't linked to your GitHub account. Check it with git config --global user.email and add that address under Settings → Emails. Commits also need to be on the default branch of a standalone repository, not a fork.
Does the GitHub contribution graph matter to recruiters? A little. It can show that you code regularly, but reviewers learn much more from one well-built, well-documented project. Don't use scripts or dummy commits to fill it, because experienced reviewers can spot that easily.
Should I upload my college assignments to GitHub?
You can, but keep them out of your pinned list, and consider grouping them into one tidy coursework repository. Also check your college's academic integrity rules, since publishing solutions to assignments that are reused each year can cause problems.
How can a beginner start contributing to open source? Start with a project you already use, and look for documentation fixes, confusing error messages or small bugs. Read the project's contributing guide, comment on an issue before working on it, and keep your first pull request small. Issues labelled "good first issue" are a reasonable place to look.
Is it okay to put tutorial projects on GitHub? Yes, as long as you're honest about it. Say in the README which course or tutorial you followed, then add something of your own on top and explain what you added. Don't pin a tutorial clone as if it were original work.
What is the GitHub Student Developer Pack? A free bundle for verified students that includes GitHub Pro, Copilot for students, Codespaces usage and offers from partner companies, which have included things like a free domain and cloud credits. You apply through GitHub Education using your college email or student ID.
Do I need a separate portfolio website if I have GitHub? It's not required, but it helps, especially for non-technical readers like recruiters and clients. A simple site on GitHub Pages with screenshots and short write-ups of your best projects, linking back to the repos, works well.
Build things people use, then explain them well
A great GitHub profile isn't really about GitHub. It's about having built a few things that matter to someone, and taking the time to explain them clearly. The platform is just where that evidence lives.
If you're a student and you haven't built anything real yet, don't start by polishing your profile. Start by finding one small problem around you, in your college, your family's shop, your neighbourhood, and build the thing that fixes it. The free THE PATH roadmap will get you there step by step, and the algorithm visualiser and developer tools on this site are free to use while you learn.
And if you run a business and need that kind of software built properly, documented and maintained, the same care this guide asks of students, tell me what you're building. I'll give you a straight answer about what it takes, and I'll tell you if something simpler would do the job.
Owais Noor
Full-Stack Developer & Digital Marketer, based in Srinagar. I write about building fast, useful websites and software — and getting them found.